
Recently I started experimenting with Azure’s CosmosDB and developed few applications using the same. To start with it this blog will help all the Azure/CosmosDB developers out there to easily setup with visual studio code. I will be sharing how to connect to Azure CosmosDB without using the portal in local machine.
To start with it, You should have visual studio code installed on your machine. If not download it from here.
We need to setup an extension with visual studio code as a initial step. Azure CosmosDB extension for visual studio code gives developers set of cool commands to work with CosmosDB. With the help of Azure CosmosDB extension developers can easily do the actions which could be done on the azure portal such as Create,delete,modify databases,Collections,views and documents. Also the hierarchical representation will provide a better way to understand the structure of database.
Step 1:
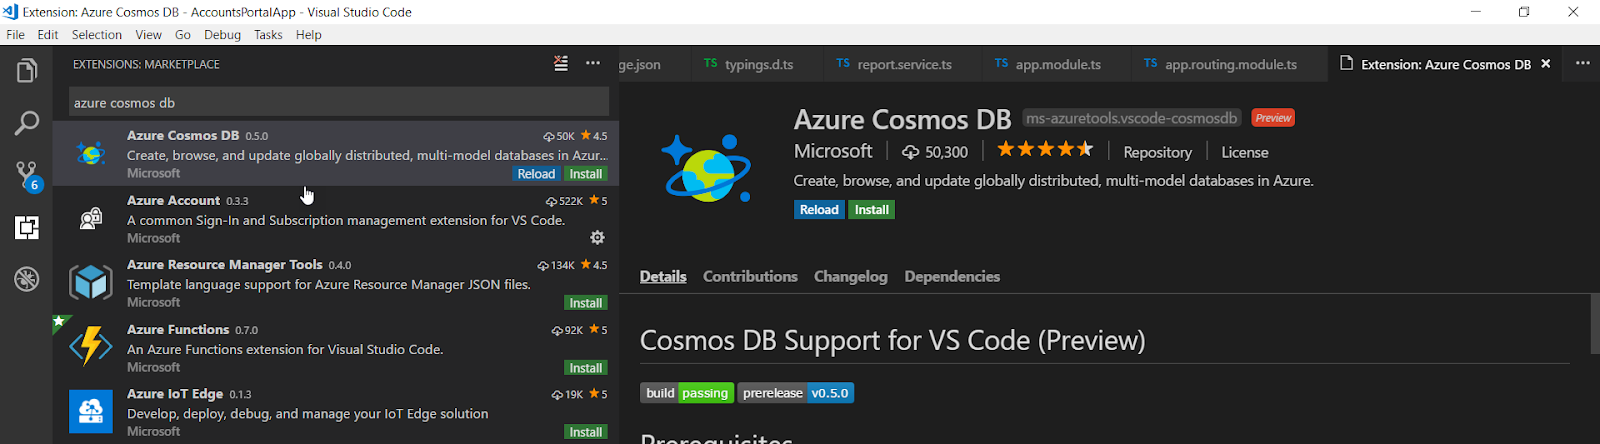
To start with, you must install the Azure CosmosDB from the market place. So, search for Azure Cosmos DB extension in the market place and click on install
Go to View – > Extensions or press Ctrl + Shift + X
Once the extension is installed, you can find Azure CosmosDB in explore section of visual studio code.

Step 2:
To explore the different types of commands with Azure Cosmos DB, open show all command palate and search for Cosmos. It will list down a different set of commands that you can play with,
Go to View – > Extensions or press Ctrl + Shift + P

Step 3:
Now the extension is installed successfully. Lets see how to connect to Azure CosmosDB in local machine. Move back to Azure CosmosDB extension section in the explorer panel. Sign in to Azure account to view the CosmosDB accounts inside the visual studio code alternatively you can select “Attach Database Account”

Select the specific Database Account API, in this case it is DocumentDB and enter the connection string copied from the portal

To get the connection string from the Azure Portal, navigate to the respective CosmosDB Resource, and from the left side panel Settings –> Keys -> Connection String Copy the Primary Connection String.

Now you can see the database displayed with the account provided in the azure CosmosDB explorer pane.

That’s it Now you can Add, Modify Database, collection, and documents within Visual Studio Code. Play around with all the commands and features of the extension.
Step 4: Installing Azure Cosmos DB Emulator
Azure Cosmos DB Emulator provides a local environment that emulates the Azure CosmosDB service for your development. With the Azure Cosmos DB Emulator, you can develop and test your application locally, without creating an Azure subscription and without internet connection. With the extension we installed already you can connect with Local Emulator as well.
Download Azure CosmosDB emulator:
You can download emulator from Microsoft Download Center.
- Extract setup and run emulator exe.
- Once you completed the setup, type Azure Cosmos DB Emulator in Start menu.
Start the local Azure CosmosDB Emulator, and make sure it’s running.

Verify the access by exploring the local emulator on this address.
https://localhost:8081/_explorer/index.html and you should see a screen as follows.

Step 5:
Once you verify your Azure Cosmos DB Emulator is running, you can go back to Visual Studio Code and try to attach the emulator by selecting Connected with Azure Cosmos DB Emulator option

After 1 or 2 minutes, you can find your local Cosmos DB data also mapped in Visual Studio Code.

As a developer I found this extension is very powerful and if you are developing Azure based solution with Visual Studio code, you must start exploring this.
Start building application with cosmosdb today 😊 Cheers!

Really nice Article but could u plz start from scratch and end at expert level
LikeLike